
Oct
Algae, Algae Control, Planted Tank Basics, Problem Solving, Solution
Thirteen 13 Aquarium Algae Types Identify It And Solve The Problem
Learn to recognize the different aquarium algae types that may grow in your freshwater aquarium and how to remove the algae. Here we explore the causes and solutions so you can identify and solve algae problems. Understand the reason for it and solve the problem.
Understanding the basics of algae types in an aquarium
At some point, everyone faces some algae in their aquarium. Don’t get frustrated. Learn what type of algae you have. Have patience and focus on water quality combined with plant growth for success. This guide will help you find the different causes of algae proliferation and help you address those causes. Other types of algae will indicate slightly different reasons. This is the starting point for the source of trouble and its solution.
Algae proliferation (an algae bloom) is generally a product of a “biological system failure or process.” It can indicate that a mistake was made (or a series of errors) when balancing the aquatic ecosystem. It can also mean a setup problem with equipment or that some environmental factor is incorrect. The point is, do not fight algae! Find the cause and ELIMINATE it!
The good news is that by gaining some expertise – or occasionally spending just a bit of money on aquarium equipment to support the equilibrium, it is possible to maintain an algae-free, beautiful aquarium. It is never a good idea to only treat the symptoms. It is not enough to remove the algae (if it can be removed at all), and it is absolutely the worst idea to only use algae remover chemicals as a fix. Instead, find the flaws in the system.
We, hobbyists, think everything is “perfect” – “I have good filtration, good CO2, my light is enough, my water is perfect, and I still have algae”. Nature is always proper. We are always wrong, regardless if we know why. Stay humble.
What causes algae to appear?
In short: the presence of light, excess nutrients, and or improper gas exchange.
The problem in new aquariums is that ammonia and organic waste cannot be “eliminated” unless larger, daily water changes are made in the aquarium. This is a symptom cure. In a new aquarium, proper levels of beneficial bacteria are not present in large enough quantities for the aquarium to be balanced. The goal is to find out what causes the ammonia levels or nutrients to spike in the water. This is where things get more complicated because there can be more than one cause or combination.
Ammonia or excess nutrients result from decomposing organic elements in the water. This can be from multiple sources – a dirty or inefficient filter, lack of surface agitation (skimming), lower gas exchange, a fish that died and remained undiscovered, decomposing plant leaves, accumulated debris, etc.
Do Plant Fertilizers Cause Algae?
Many suggest algae are caused by the nutrients being added from plant supplements. Suppose you have used a professional plant fertilizer (like Lush by aquaLife) and dose regularly. In that case, you might start to see algae blooming and get the wrong idea that nutrients cause the whole situation. This is not always correct. Algae are like plants but on a lower evolution level. Both algae and plants will grow faster if there are nutrients in the water. Algae have much lower nutrient requirements to survive compared to aquatic plants. If plants don’t do well because they are starving, old growth will deteriorate. The organic proteins released by decaying leaves trigger algae spores that feed off these substances. Therefore it is common to see algae in aquariums attaching to older growth and plants not growing well. The opposite is also true; healthy plants are extremely algae resistant. Filling up a tank full of healthy plants is the easiest way to get a good head start and keep algae under control.
The solution to the problem is not to stop dosing fertilizers altogether. You want fast growing, healthy plants that absorb nutrients and starve out algae by absorbing the nutrients along with animals that consume it.
“The ultimate goal is to create a stable ecosystem where all inhabitants (plants and fish alike) are thriving, the water is clean, and the filter does the job. When in trouble, please remember that Jeff Miotke said – ‘I have not encountered a case in years where I could not solve an algae problem by identifying the cause and addressing the issue with patience and understanding.’ Professional Aquascaper
Note! Since this quote, we know of one case that Jeff just did a restart because he was on a deadline for a competition. 😉
Read More: Peroxide Treatment For Algae in Aquariums
Algae Types and Solutions for Removing them.
1. Brown Algae Diatoms (Diatomaceae)
Brown algae is a type of Diatom or microalgae that can survive in lower lighting conditions.
Diatoms are members of the algal class Bacillariophyceae. It appears as brown patches and/or stringy brown mass (thin brown threads). It is more common in the first couple of weeks of new setups but can appear in older tanks with nutrient spikes, such as increased silicate. Neither is a “dangerous” algae type. Both can disappear quickly or be removed easily (by just wiping the aquarium glass).
Diatoms are consumed by microfauna as the aquarium matures. In almost all cases, diatoms go away by themselves without further intervention once a new aquarium is fully cycled and the biological filtration is mature.


Common causes of diatoms
- Biologically immature planted tanks
- Instabilities that reset/disrupt the biological cycle (People use exotic substrates, especially for DIY dirt substrate and additives can face this)
- Poor water quality from tap or other water used for the aquarium. It may contain Silicate or other nutrients.
How to Remove Diatoms or Brown Algae
Algae eating fish like Otocinclus Affinis will consume it and remove it quickly from your aquarium. In low-tech (non-CO2) aquariums, you will need to increase light intensity (not the hours of illumination) – but please remember that increasing the light will result in higher CO2 and fertilizer needs. With new, high-tech aquariums, brown algae will disappear by itself over time. You can remove it physically and help the spread of nitrifying bacteria. Appearance in older, properly lit aquariums will show poor water quality and the presence of Silicates.
To remove brown algae from your older aquarium, you must remove the nutrients it depends on to survive. Use a vacuum to remove the brown algae. See this article on tanks with aquasoil or soil type substrates. Once finished, use a soft cloth to wipe down your aquarium glass. To remove the nutrients, do partial water changes. Also, check your aquarium lighting to ensure you’re not using too little or too much light. Natural sunlight can also be a problem – ensure that light isn’t reflecting off any mirrors, white walls, or pictures in the room.
Pro-Tip: If high water temperature contributes to brown algae growth, gradually lower the temperature in your tank. Quick temperature changes can shock your fish and invertebrates.
Solutions for Removing Brown Diatom Algae
- Speed up tank cycling using bacteria culture such as aquaLife Activate.
- Review tank additives: some may kill helpful bacteria.
- Pay attention to overall plant health and plant mass
- Manually siphon off mild cases
- Use Reverse osmosis water for top off and water changes that has been re-mineralized with a product like those from aquaLife, Azoo, Seachem Equalibrium or their better product – Aquavitro Mineralize (available in our local facility or via phone call only.)
- Use aquaLife Phosphate remover if silicate is present or high and reverse osmosis (R/O) water is not an option.
- Otocinclus Affinis catfish eat it.


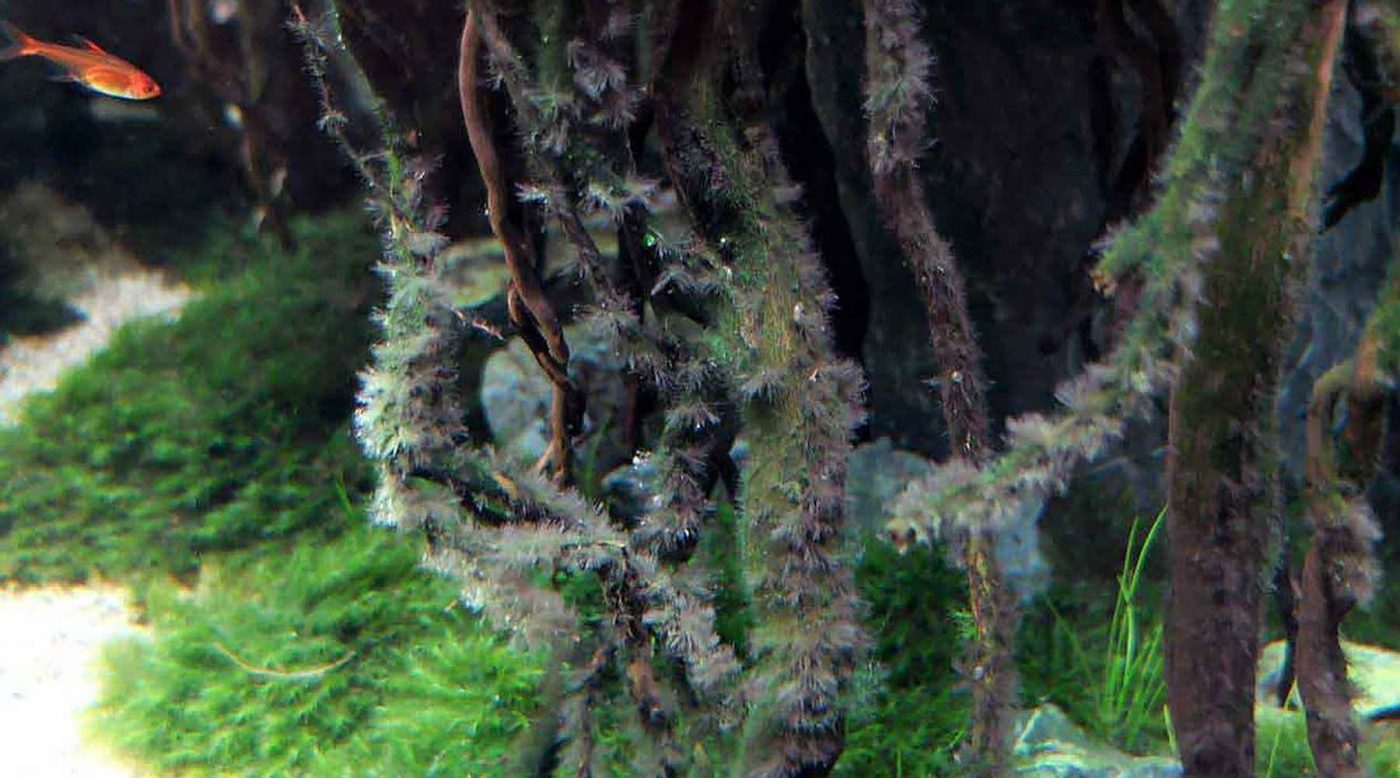
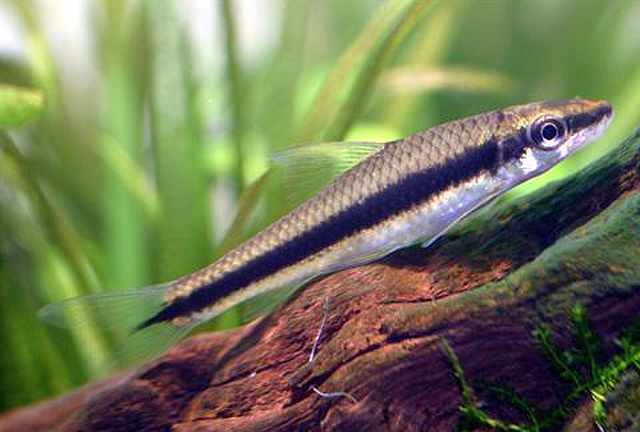
2. Black Brush or Beard Algae – BBA (Audouinella sp.)
Often called Black Beard algae – this is a very difficult type of algae to get rid of!
This algae has a blackish or purplish appearance and grows in hair-like patches in your tank. This slippery alga is tricky to remove and looks a bit like a beard – hence its name. The small black, dark-grey, or reddish hairballs will grow in clumps or patches of fine tufts with a length of ¼ inch. It likes places with strong water flow and sticks to hardscape or submersed equipment (filter in and outflows, internal filters, overflows, etc.) If you have hard water, the calcium will get incorporated into the threads, and algae eaters will not like it.
Another common cause is water flow. If your tank is experiencing a lack of oxygen, you can add an air pump to help improve oxygen levels. Also, be sure to check the temperature of your water. If it’s too warm, it will hold less oxygen.


How to Remove Black Beard Algae
The Siamese Algae eater and Amano shrimp will eat it, but they are not efficient enough to eradicate stubborn cases. In a strongly lit aquarium, it can be caused by the lack or uneven distribution of CO2, which will need to be addressed.
This is one of the most difficult algae to remove. It appears without apparent cause, even in older, very stable, lush tanks. Most of the time, the only solution is to remove the spots – one by one with scrubbing, and even that will not guarantee it will not return. Removal is aided immensely by this tool: Hydra Aquatics algae picker. A liquid carbon additive such as Evoke (switch the filter off and apply locally with a syringe) will help kill BGA. It will turn red and whitish before disappearing. Hydrogen peroxide treatments can help. (If fish or shrimp are present, use them with caution.)
Another extreme option some hobbyists resort to is dipping plants heavily covered by the algae into a 1:20 ratio bleach and water solution for approximately two to three minutes. This is the last resort. Because of the risk to fish, the plants should not be taken immediately back to a display tank if this is done. Instead, aerate them in a separate container of dechlorinated tap water and access the results.
Pro Tip: We rarely recommend this treatment and do not guarantee the safety or the results for this method. Make sure that all your aquatic plants, hardscape items, etc. have no bleach on them prior to adding into the tank, and never pour bleach directly into your tank.
Common Causes of BGA Black Beard Algae
- Fluctuating CO2 levels in the tank
- High amount of organic waste/dirty tank
- Stressed plants/old growth
- Systemic instabilities that lead to plant stress; poor water quality, harsh use of biocides, etc.
- Excessive flow with heavy misting (observe if it spawns in areas that are directly in path of flow), especially on slow growers/moss
Solutions to Remove Black Beard Algae
- Regularly vacuum substrate surface while stirring up debris with turkey baster (see below) to reduce organic debris. This makes a big impact.
- Find ways to stabilize CO2 levels. Generally speaking, higher injection rates create more stable CO2 levels, so increasing CO2 injection is generally recommended.
- Garra Rufa Fish eat it and can help
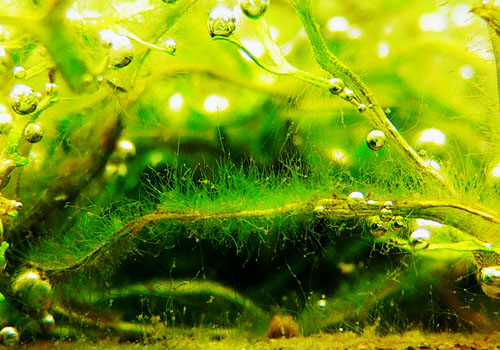
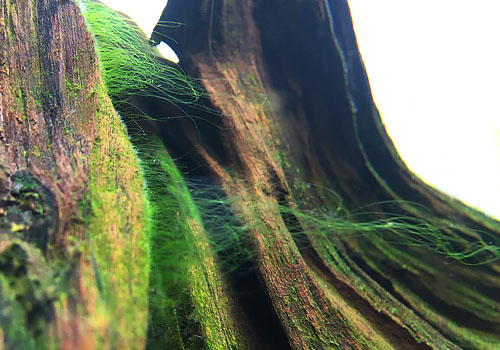
3. Blanket Weed (Cladophora sp.)
This is widely considered the worst aquarium algae type to remove from your tank. Blanket Weed is a rough, branching algae that looks like moss. It appears as string filaments or green turfs in areas of high light and poor flow. This algae is more challenging than ordinary hair algae and does not break apart as easily as other filamentous green algae. Its distinctive smell can identify it. This is a higher-level alga that is not deterred by healthy plant mass. Although more robust plants will out-compete it by shading it out, mosses, fine carpets, and slower growing plants are more vulnerable to it.


How to Remove Blanket Weed From an Aquarium
Should you have a small infestation of blanket weed, you may be able to remove this pesky algae yourself. Upon removing, you’ll want to shut off the current in your tank to avoid unknowingly creating new algae populations during the removal process. When removing, use a pair of long tweezers and remove as much as possible. Then use Evoke with a syringe to target dose to help remedy the worst areas where the algae tend to grow.
It will attach hard at a single point and spread from there, so it can be isolated and removed from the middle of plants. If it contaminates moss, you will need to trim it down. Algae eaters will avoid it. Improving flow and CO2 will help. Weaker lighting will push it back relative to the plants.
Pro Tip: Ensure you are picky about where to purchase your aquarium plants to avoid this tricky alga. Always quarantine new aquatic plants before introducing them into your tank. It is best to prevent these algae at all costs because removing them is very tough. It cannot easily spread in the air, so you can only prevent it using lab-grown, tissue cultured plants in your aquarium. We have the best Tissue Cultured plants from Tropica.
Common Causes of Blanket Weed
- Slow flow, high light dead spots
- Slow growing, over-crowded spots
- Decaying undergrowth
Solutions for Removing Blanket Weed
- Manual removal, spot treat with hydrogen peroxide for mild cases
- Prune / remove old growth
- Increase growth rates by optimizing CO2, nutrient levels
- Reconfigure problem areas to feature larger, more robust plants
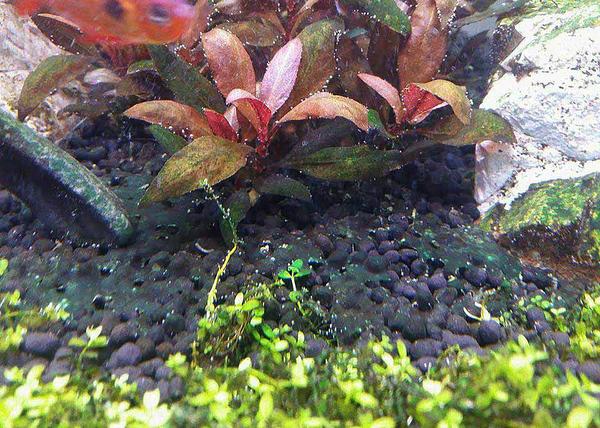
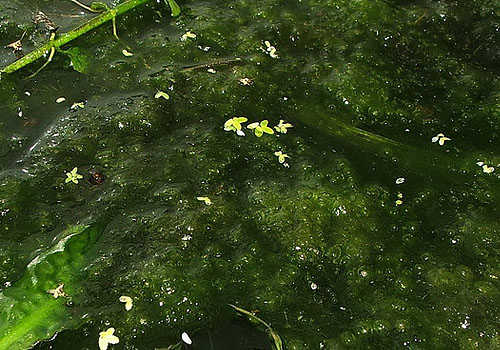
4. Blue-Green Algae BGA (Cyanobacteria)
Technically, blue-green algae aren’t true algae. It is classified as an aquatic cyanobacterium. It is a nitrogen-fixing bacteria that will absorb all the nitrogen in your tank. Blue-green algae is an issue because it is a rapidly-growing cyanobacterium that quickly covers everything in your tank with either a green, blue, reddish-purple or brown slimy substance. You’ll commonly find it along the front of your tank’s glass, where the light hits it most often. Common causes of the growth of blue-green algae include high levels of waste from overfeeding or too few water changes. As your blue-green algae/cyanobacteria develop, they will use up your nitrates.
BGA are photosynthesizing bacteria. Many types can appear in the aquarium. Some of them will thrive in high nitrogen-level substrates with decomposing organics. Others will appear in entirely nitrogen-free environments. Most common are the blue-green, grey, or black-colored types that will form a plaque on the substrate surface and plants. This plaque can be easily removed with a hose during water changes, but it will usually reappear if you do not address the cause.
It also frequently appears between the glass and the substrate or plants, at the bottom of the aquarium, or along the front glass and sides. Once it appears, it will spread quickly and become dangerous to the ecosystem. A foul smell around the aquarium also characterizes the invasion.

How to Remove Blue-Green Algae
The most effective way to remove blue-green algae from your tank is to use a technique called “Black Out.” BGA cannot survive without a source of light. There are other ways to remove blue-green algae, such as 1.) doing a 50% water change, 2.) testing your nitrate levels to see if they’re too low, 3.) adding an airstone, 4.) turning off your lights for three to four days, and then 5.) testing the results after doing the first four steps to see if there’s a slowing of BGA growth. We recommend trying these options before performing a “Black Out.”
A lighting blackout will help as a symptom treatment, but if ineffective, use antibiotics as a last resort. Because we are dealing with bacteria here, the Erythromycin (antibiotic) is effective but can also kill the nitrifying bacteria in the aquarium and filter. This is a drastic measure. If this path is chosen, test the water carefully and help recolonize the filter and substrate with bacteria additives like Activate after treatment. When the BGA does not appear very invasive, try to remove it with regular water changes and use fast-growing stem plants. If nitrate levels were low in your aquarium, you might want to increase that to 10-30 ppm.
Pro-Tip: Use “Black Out” as a last resort to remove blue-green algae. Remove ALL sources of aquarium light or natural lighting that shine into the tank. During this process, you will need to keep your tank well-aerated. Your aquatic plants will handle the process of “Black-Out” better than the algae. Feed your fish and other livestock sparingly (you can turn on lights briefly for this). If you have aquatic plants that rely heavily on light, keep the “Black-Out” for a maximum of seven days. Your shade-preferring plants, such as Anubias, Cryptocoryne, mosses, and ferns, will be fine for a two-week “Black-Out.”
Common Causes of Blue Green Algae BGA in an Aquarium
- Unstable or immature tank bio-filter causing bacteria imbalance
- Low oxygen or nitrates, coupled with high light
- Build-up of organic waste & detritus
- Dead spots/low flow areas
Solutions For Removing Blue Green Algae from an Aquarium BGA
- Small spots can be manually removed or spot dosed with Evoke and Hydrogen peroxide
- Improving circulation & oxygenation in affected areas can clear mild cases
- Serious outbreaks may require antibiotics such as Erythromycin by aquaLife. This may impact your nitrifying bacteria though. Commercial products such as Chemi-Clean work as well.
- Serious outbreaks may be solved by 3-5 day lighting blackout
- Water changes and light substrate vacuum to clear organic debris
- Increase dosage of nitrates if plants are nitrogen with Lush.
- Dose with Prosper
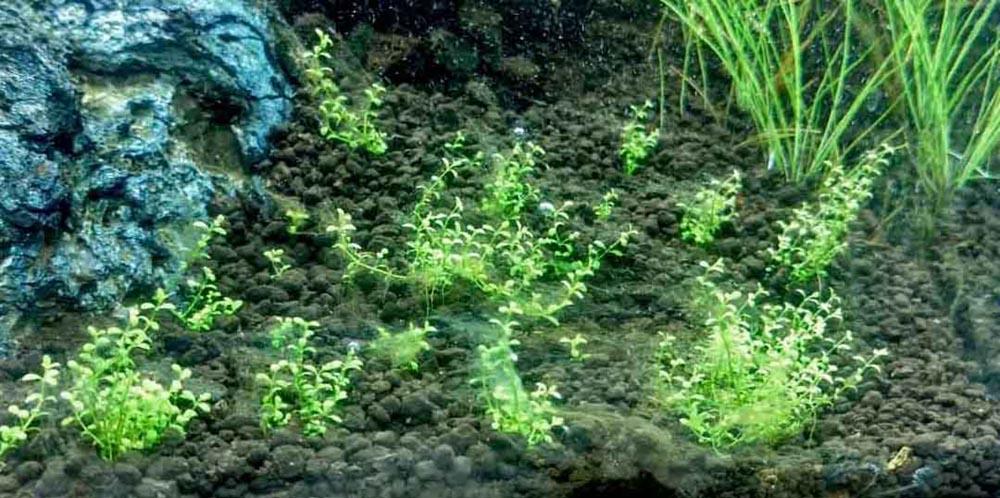
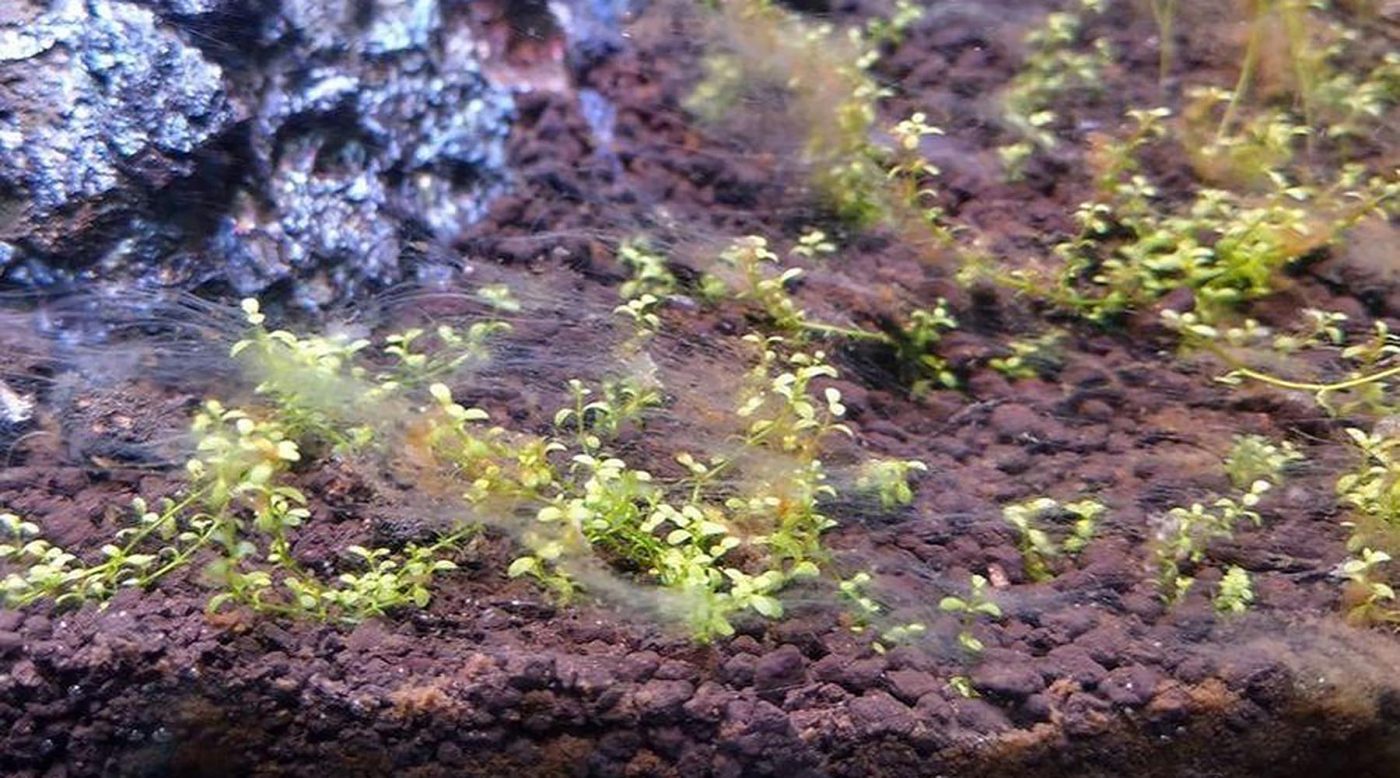
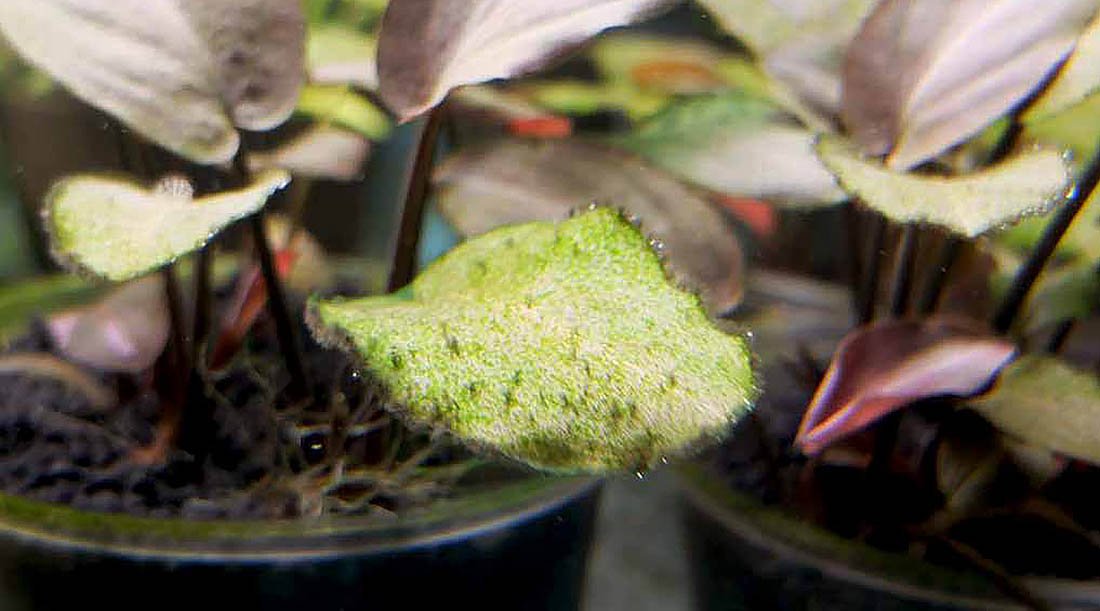
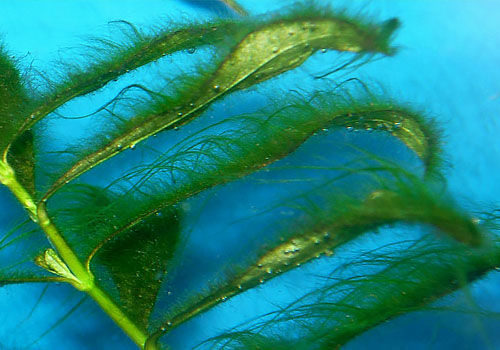
5. Fuzz Algae Green Fuzz Algae (Oedogonium) filamentous hair algae
This short green algae creates a fuzzy appearance on aquatic plants, aquascaping decor, and aquarium glass. Green Fuzz Algae is a thread alga that grows thin threads of just a couple of millimeters on plant leaves. All threadlike algae are indicative of low- or fluctuating CO2 levels. It typically grows in new tanks, which are more subject to a nutrient imbalance because they are still maturing. If your tank is more mature and you have fuzz algae growing out of control, your aquarium is experiencing an imbalance of nutrients and low levels of CO2. A small amount of fuzz algae in your tank is acceptable.
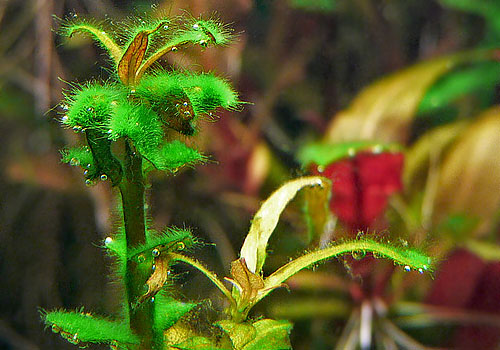


One cause of carbon dioxide fluctuation is varying CO2 levels in the aquarium or where CO2 is improperly distributed throughout the aquarium. Another cause could be a pH controller or a timer that was incorrectly set up. CO2 levels are ideal when they reach the desired level when light, including natural light in your room, appears. It indicates when plants are suffering with leaves rotting locally due to mainly nutrient deficiency. It can appear on old and damaged leaves.
When found growing on or attached to even fast-growing stem plants, this generally means that plants are either damaged, stressed, or deficient.
When algae preferentially attach to plants rather than hardscape, it happens because plants have deteriorating leaves due to age, nutrient deficiencies, or damage. Alternatively, the plants could be under stress from transplant stress, pruning, or varying parameters.
Siamese Algae Eater
How to Remove Fuzz Algae
To help remedy your tank’s fuzz algae, test the nutrients and CO2 levels and adjust as needed for the proper balance. Then, you’ll want to invest in some algae eaters who will effectively remove your fuzz algae. These include 1.) Siamese Algae Eaters (SAE), (pictured here) 2.) Amano shrimp, 3.) Otocinclus, 4.) Black Mollies, or 5.) Bristlenose Plecos. Investing in these critters and fish will help create a better aquatic environment for your plants to thrive in so that they will outgrow and no longer have to compete with the algae for nutrients.
Pro-Tip: We recommend testing your nutrient and CO2 levels first to see if that helps resolve the fuzz algae outbreak. To address the cause, ensure the proper CO2 levels and time your CO2 injection according to the lighting period (start 1-3 hours before and switch it off altogether with the lights). The CO2 demand from plants can rise due to a cast of morning light, even if your light switches on at noon.
If the issue persists, investing in algae-eating invertebrates and fish will help to remedy the problem and prevent the algae from growing again.
Common causes of Green Fuzz Algae (Oedogonium) filamentous hair algae
- Unhealthy, deficient, or stressed plants (sub-optimal CO2, nutrient issues, overcrowding, transplant shock, physical damage, over-pruning stress, unstable or extreme tank parameters).
- The abundance of old, deteriorating growth.
Spike in ammonia/urea source in the tank (DIY fertilizers not made for aquariums), uncycled aquariums, heavy feeding, nutrient formulas that contain urea/ammonia, dead livestock
Solutions to Remove Fuzz Algae / Hair Algae
- Replant healthy tops and discard old bottoms until no more visible algae are attached to the old growth. Prune off badly affected old growth.
- Mild cases will generally disappear by themselves as plant health and tank stability improves.
- Severe cases can be killed off by hydrogen peroxide & other commercial algaecides, but base causes need to be addressed, or the algae may return. Always consider treatment risks before using them.
- Solve underlying plant health issues – this alga rarely occurs naturally without a trigger.
- Water changes, clearing of detritus, old growth.
- Plant larger, more robust, easier plants to increase plant mass in the tank.
- Adjust CO2 levels
- Use Evoke and slowly increase it to double the dose if fish or inverts will tolerate it.
- Caridina Multidentata Shrimp (amano shrimp help eat it)
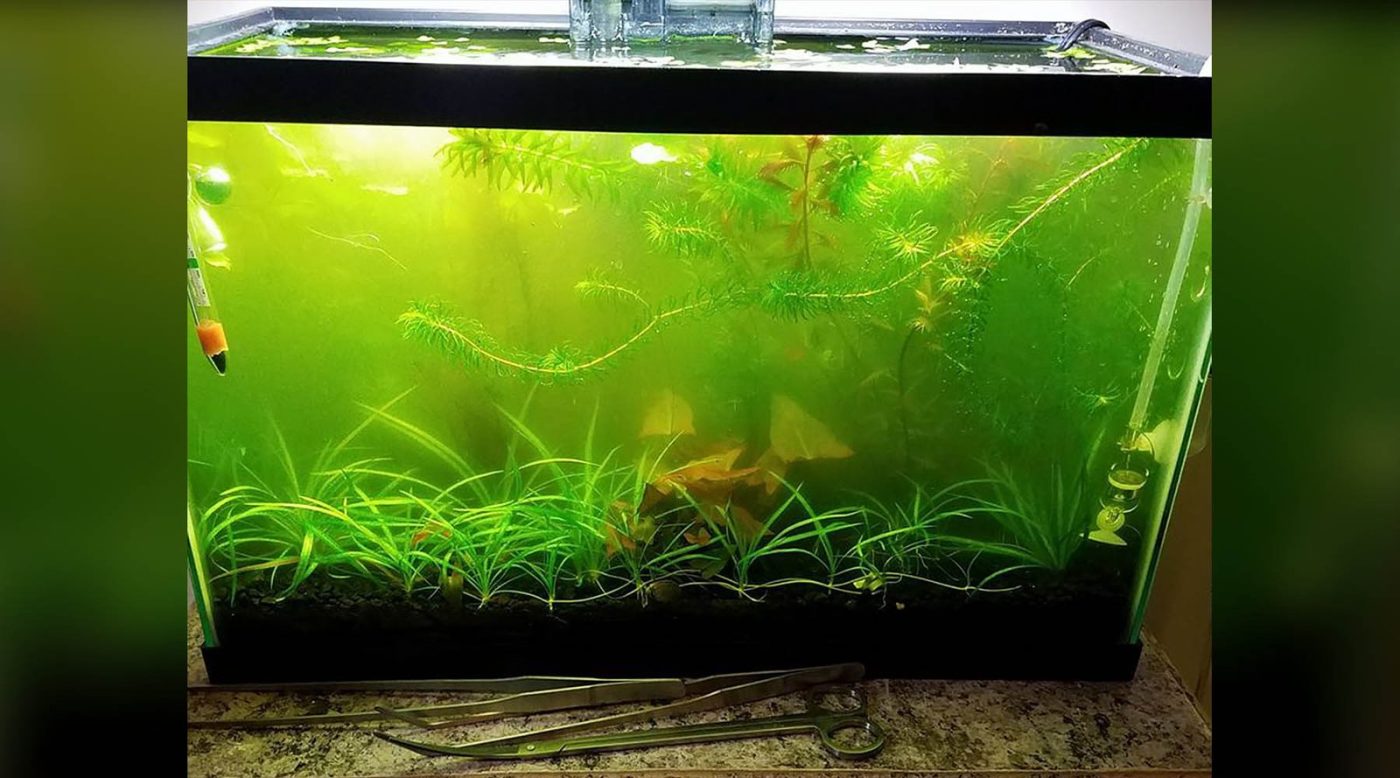
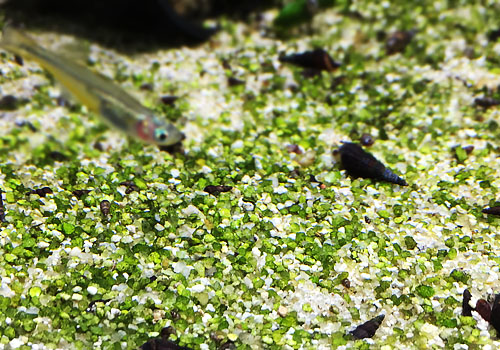
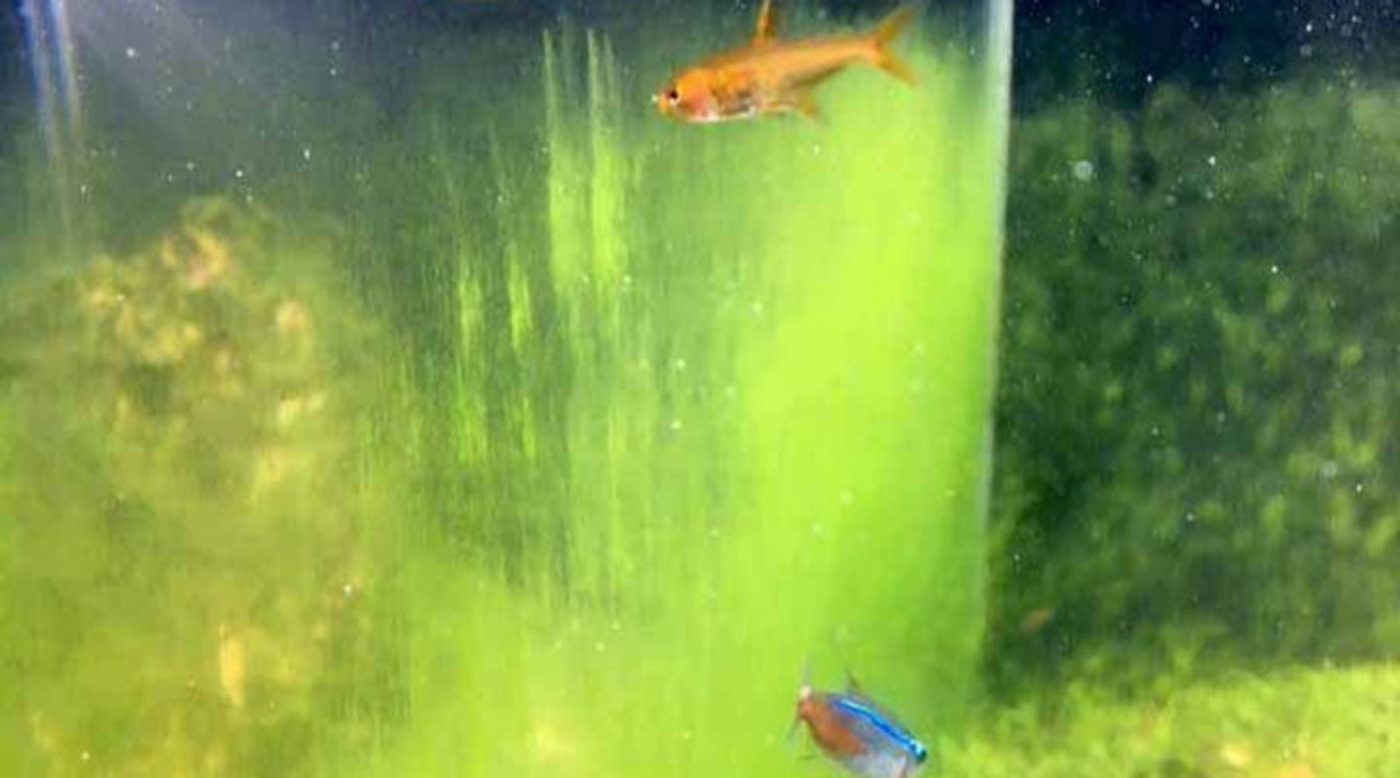
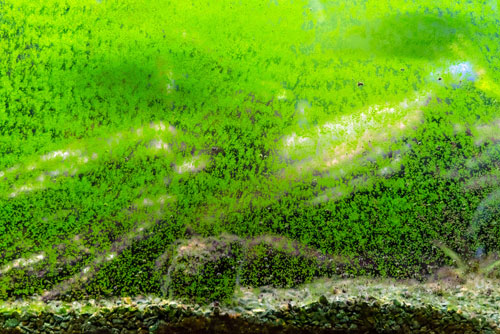
6. Green Aquarium Water Algae
If you suddenly experience aquarium water that turns an unsightly pea-soup green coloration, you likely have green aquarium water algae in your tank. Fortunately, this algae isn’t toxic to your fish. It appears when a bloom of unicellular algae occurs, replicating quickly and spreading throughout your tank. Floating algae cause green Water. It can be composed of multiple types of organisms, from actual green algae like Chlorella to flagellates. It appears very quickly, and it isn’t easy to eliminate


Typically, the causes of green aquarium water algae are either:
- a sudden amount of lighting, or
- a spike in the level of nutrients in your tank.
For example, a sudden amount of ammonia or a double dose of fertilizer will help to cause sudden green aquarium water algae growth. Another cause may be when you overfeed your fish and then forget to do a water change. This will result in an excess of nutrients, which also aids in the undesirable growth of green aquarium water algae. New tank owners should also ensure there are plenty of nitrifying bacteria that can take care of the ammonia levels to avoid any growth of this algae.
Improving water quality (with water changes, for example) will not solve the problem. Once the algae have bloomed, it will survive even in low-nutrient conditions. You can do a 4-day light blackout to solve the problem but bear in mind that the algae that have been killed might cause ammonia spikes. Always ensure good aeration with blackouts. Using a UV sterilizer is highly effective against Green Water.
There are also chemical solutions that might seem easy to apply, but they are far from ideal. They might kill algae but also adversely affect your sensitive fish or plants.
The cloudy but not green water is caused by floating ciliates (also known as infusoria among aquarists). Some of these tiny creatures will possess chlorophylls, so they can also use light and thrive in low-nutrient conditions. You will need to initiate a lighting blackout or use UV filter treatment. Green Water has its advantages in the aquarium hobby – you can use it as food for hatching Artemia and Cladoceras (water fleas).
How to Remove Green Aquarium Water Algae
First, you’ll need to know that water changes do not effectively mitigate your green aquarium water algae issue. The reason? This algae is a single-celled organism. As a result, you’ll have to use a UV sterilizer or a “Black Out” technique.
Pro-Tip: Please note “Black-Out” is the last resort technique. We recommend utilizing a UV sterilizer and invertebrates first to remedy the growth of green aquarium water algae unless the issue persists.
Common Causes of Green Water Algae
The primary cause is excess ammonia coupled with strong light for extended periods. This may occur particularly in new tanks / planted tanks that are not biologically mature. Green Water also often results from over-feeding, high levels of livestock waste, and/or plant decomposition. It is more common in very warm tanks (> 80 F).
Solutions for green water algae
- Some mild cases disappear on their own as the tank matures.
- Immediately lower light intensity (by increasing the distance of the light source from the tank or adding shades) and reduce lighting-period to five hours or less until problem disappears.
- Mild cases can be cured by using Purigen as filtration media.
- 4 – 5 day light blackout for serious cases
- UV sterilization is a 100% cure for serious cases
UV Sterilizer Products


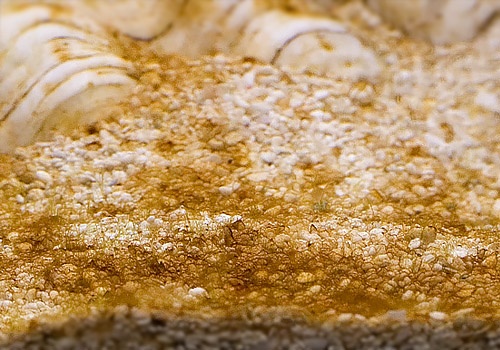
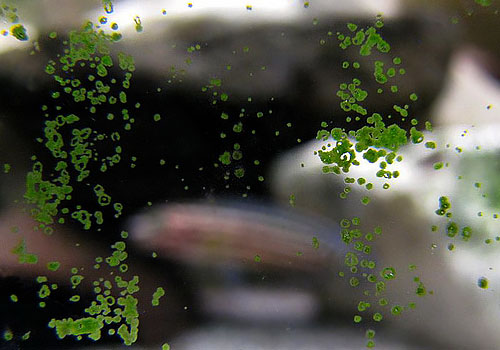
7. Green Dust Algae (GDA)
Green dust algae (GDA) is sometimes misidentified as Green spot algae. However, they’re not the same type of algae. GDA is a surface clinger that will grow as a green slime on your aquarium glass, but not in water.
Green dust algae form a green film on rocks and, most noticeably, on walls of planted tanks. It is easily wiped off but returns quickly. In tanks with strong light, it can reappear within a day. The small green spots form a dust like film on aquarium glass and hardscape. This type of algae will not usually grow on plants. GDA is easily differentiated from GSA (Green spot algae) as it grows much more quickly (with no particular dot formation) and forms a prominent thin green film on tank walls.

It is a type of zoospore that consists of individual cells capable of movement. In less severe cases, it means weekly scraping/wiping of tank walls. For aquascapers that have had tanks that suffer from chronic GDA, wiping the glass every week might seem inevitable. It is not. GDA is more frequently seen in new aquariums. GDA is more common in tanks with tons of light and nitrogenous waste or heavy nutrient dosing. Ammonia or nitrogenous waste can trigger it easily.
This alga occurs commonly in newly planted aquarium setups. Now and then, it also occurs in mature aquariums that are experiencing an insufficient or erratic balance of nutrients and CO2. It isn’t harmful to aquatic plants or fish, but it looks terrible.
Tanks with high nitrate (NO3) levels (above 10ppm) and low plant mass are more vulnerable to having it. Cooler temperature tanks, with more moderate lighting, and leaner dosing regimens, have much fewer instances of this algae.
How to Remove Green Dust Algae
First, ensure you have an aquarium test kit on hand. Be sure to test your pH levels, phosphates, nitrates, etc. If there’s an imbalance, resolve it, and then you can invest in a UV sterilizer if you don’t already have one. A UV sterilizer will kill the algae spores in your water. You can also invest in Bristlenose Plecos, who will eat your algae.
Pro-Tip: Possibly the most effective way to get rid of green dust algae in your aquarium is to do nothing and wait for the algae to complete its life cycle (which lasts for about four weeks).
DON’T ATTEMPT TO REMOVE THE ALGAE DURING THIS PERIOD. Attempting to wipe away the green dust algae will cause the algae to release spores and start the life cycle over again. When the four weeks are up, perform a water change and lower the water level as much as possible. Then wipe the algae off the glass.
Common causes of GDA
- Biologically immature tanks
- Lack of dominant plant mass in tank
- High light coupled with heavy water column fertilization (common in tanks with high NO3 > 10ppm), warm temperatures
- Organic detritus build-up in tank. Watch this video on water changes with soil substrate.
Solutions to remove GDA Green Dust algae from your aquarium
- Build up dominant plant mass in the tank (70% + planted)
- Optimize CO2 levels and/or use Evoke
- 3-5 days of light blackout for serious cases
- Consider a leaner dosing regimen (specifically, lower NO3 levels – keep it at 5ppm & below) until things stabilize
- Bristlenose Plecos will eat it
8. Green Spot Algae (GSA) (Choleochaete)
As we mentioned before, the similar-growing GSA, or green spot algae, looks like GDA and may also grow in your tank whenever there’s an imbalance of nutrients. This occurs when insufficient water changes, poor fertilization, or a lack of phosphates. Other potential causes include low CO2 levels, poor water flow, and exposing your tank to too much light. Green spot algae will look like patches of small green spots on your glass, equipment, decorations, and even plants.
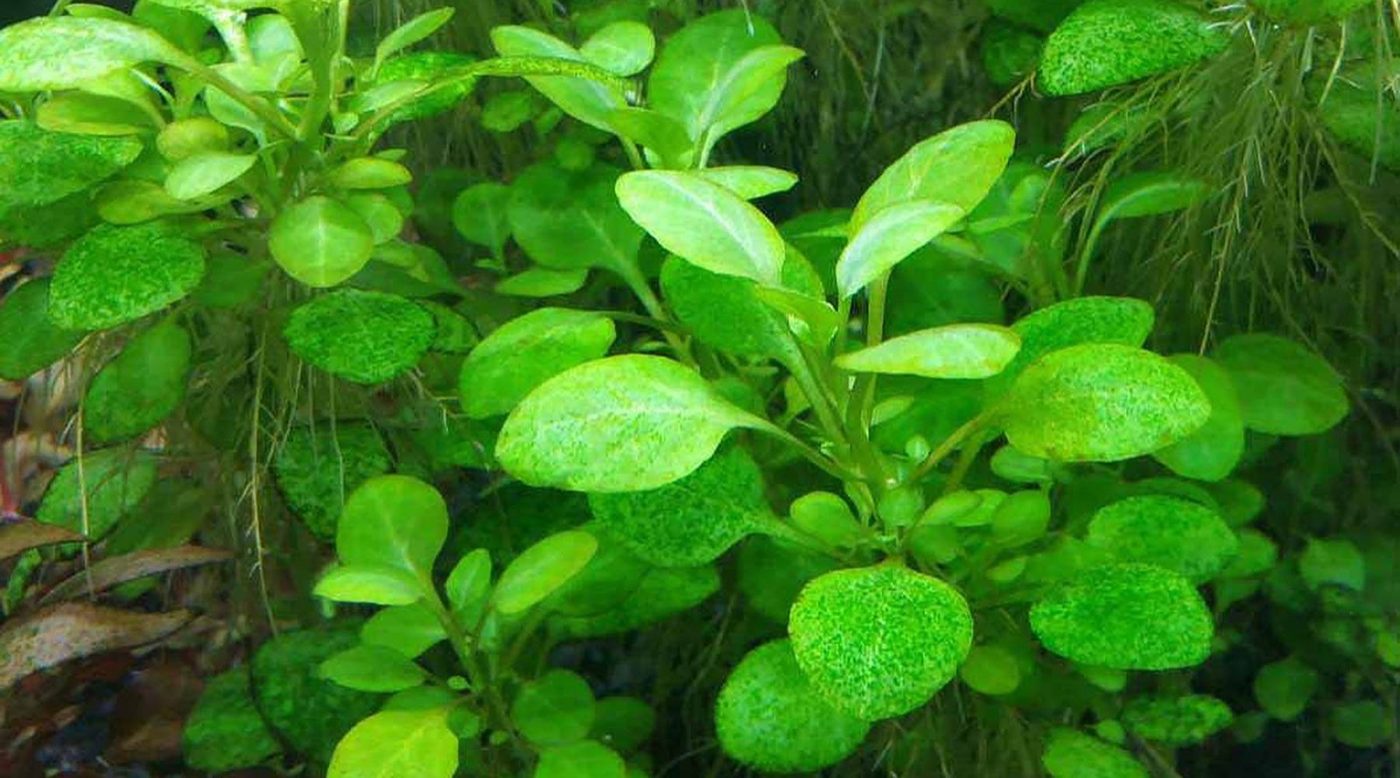
It will also appear on slow-growing plants, typically the Anubias-types. It is the algae of healthy aquariums; you will probably see some of it in all aquariums. There is a difference between green spot algae (GSA) vs. green dust algae (GDA). Green spot algae form distinct circular dots that are very tough to scrape off, while green dust algae are easily wiped or scrapped away though it may create a thick layer that is harder to clear. Spots usually take longer to form, while green dust algae can form a green film across the glass within a day or two. GSA Commonly strikes old growth on plants first.
It likes intense lighting and blooms when phosphate and/or CO2 levels are low. It sticks firmly to various surfaces, so algae eaters don’t remove it. Nerite snails and shrimp will remove some of them. Livestock alone will rarely stay ahead of GSA. Use an algae scraper to remove it from the glass and replant the slow-growing plants that tolerate low lighting in shady areas.
You should pay attention to regular water changes and efficient filtration with medium-light aquariums.
With intense lighting, check the efficiency of the fertilizing regimen and CO2 injection. Use a professional level fertilizer like Lush by aquaLife. Switch to Lush from Phytotone if you are using it. This will increase the amount of nutrients for the plants, mainly caused by phosphate (PO4) deficiency. Lush adds more phosphate to address the leading cause.
How to Remove Green Spot Algae
Check your phosphate levels to see if they’re low. If so, be sure to treat that first. Once adjusted, you can remove the spot algae from the glass with an algae scraper. Be sure to check how long you’re leaving your aquarium lights on (around 9 hours is sufficient because prolonged lighting helps this alga to grow). Green spot algae eaters you can buy are sun snails and nerite snails.
Pro-Tip: If this is the only algae in the planted tank and you are not dosing phosphates, it may indicate plants are not receiving enough phosphates. If a lack of phosphates is the problem, we recommend using Lush or Seachem Flourish Phosphorus or aquaLife Lush to help raise the levels of phosphates in your tank.
Common causes of Green Spot Algae
- Poor heath or stressed plants from (poor CO2 primarily, or poor nutrient parameters PO4)
- Old, damaged leaves
- Plant stress due to unstable tank parameters or poor nutrient parameters
- High organic waste levels if present on hardscape rather than plants
Solutions to remove Green Spot Algae
- Prune off old or dead growth, replant new tips
- Address plant health issues
- Spot-dosing with Hydrogen Peroxide or Evoke may help
- Clear organic detritus in planted tank
- Use Lush or add more phosphate
- Use CO2
- Add Amano Shrimp and or Nerite snails (Clithon Corona Horned Nerite snails do well)
- Use Evoke on a regular basis
aquaLife Products


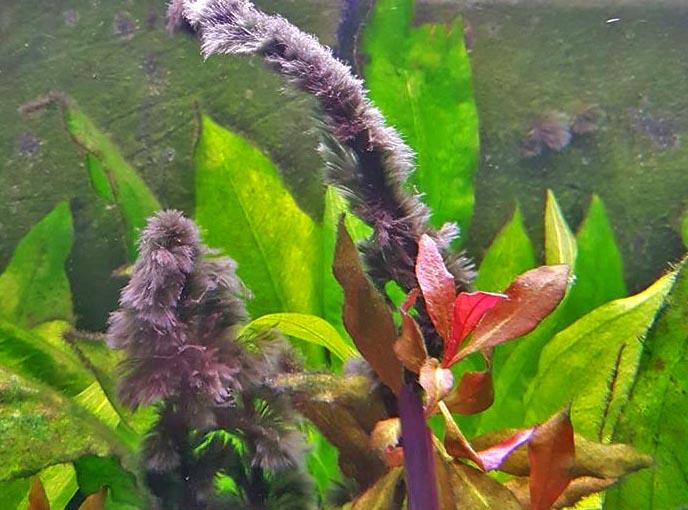
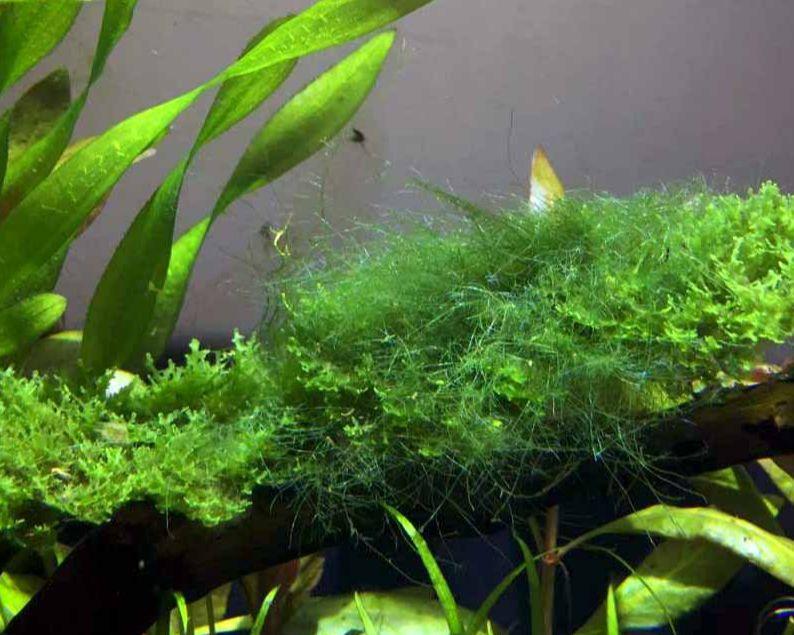
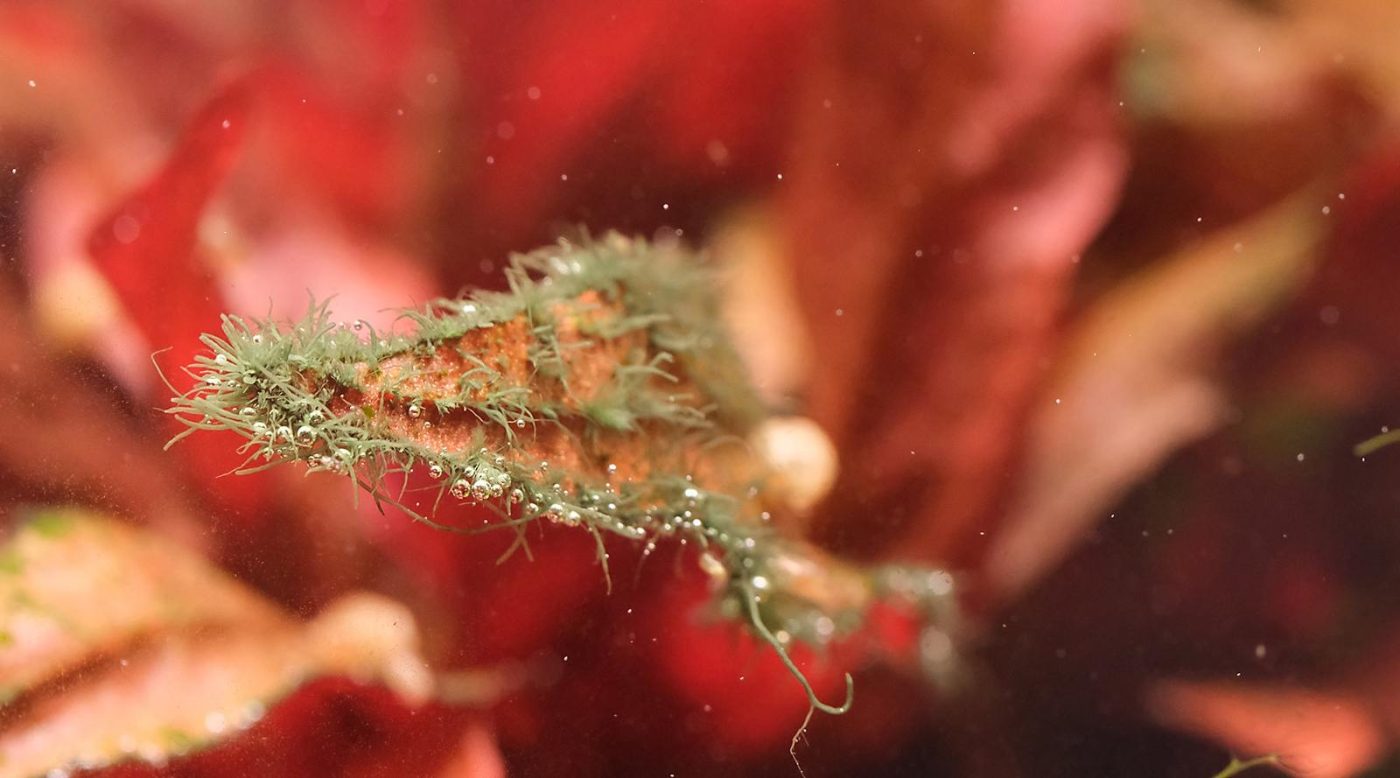
9. Green Beard Algae – GBA
GBA is presumably a more virulent form of Green Fuzz algae. The fine, longer threads will attach to plants and hardscapes. It can grow a couple of centimeters and form a dense green coat on the surface of plants and wood. It can also be very decorative at times.
All threadlike algae indicate low- or fluctuating CO2 levels. One cause of carbon dioxide fluctuation is varying CO2 levels in the aquarium. One cause could be a pH controller or a timer that was incorrectly set up. CO2 levels are ideal when they reach the desired level at the time when light, including even natural light in your room, appears.
How to Remove Green Beard Algae
Algae eaters and Amano Shrimp will eat it.
It can be difficult to remove mechanically, as it attaches quickly to surfaces. The threads are slimy and weak. It is a typical alga in fish tanks without plants, but it does not necessarily indicate bad water quality in these tanks.
In planted tanks, it indicates the lighting period is too long (reduce it to 8 hours or less), CO2 levels are too low, or there is not enough nitrate used in the water.
Use Lush to increase nitrate.
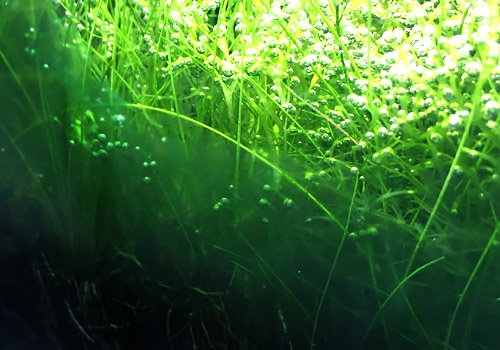
10. Water Silk (Spirogyra)
Long, strong threads with a smooth touch. It is very decorative under a microscope as the thread is a green spiral stretching the entire length. Its appearance indicates a previous ammonia spike caused by a dead, decomposing fish or by disturbing the gravel or substrate.
How to remove Water Silk
Once it is present, it is difficult to eliminate because the needs of these algae are very similar to plants.
A lighting blackout and liquid carbon treatment with Evoke will usually help.
11. Green Thread Algae
Long, span-size threads. It can be collected by coiling them on a toothbrush, but it is almost impossible to eliminate from mosses. Some say it appears due to excess iron in the water caused by unbalanced plant nutrition or ingredients from root tabs that were somehow dissolved in more significant quantities into the water. It frequently appears together with hair algae.

Change large amounts of water and reconsider the dosing regimen.
The Siamese Algae eater and Amano shrimp will eat it.
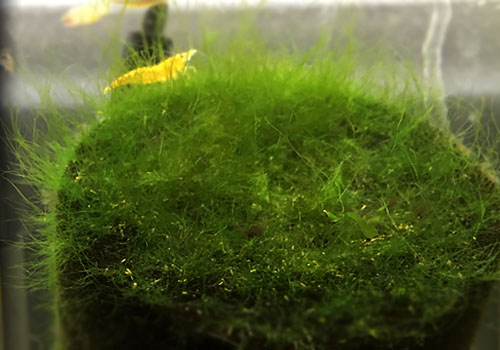
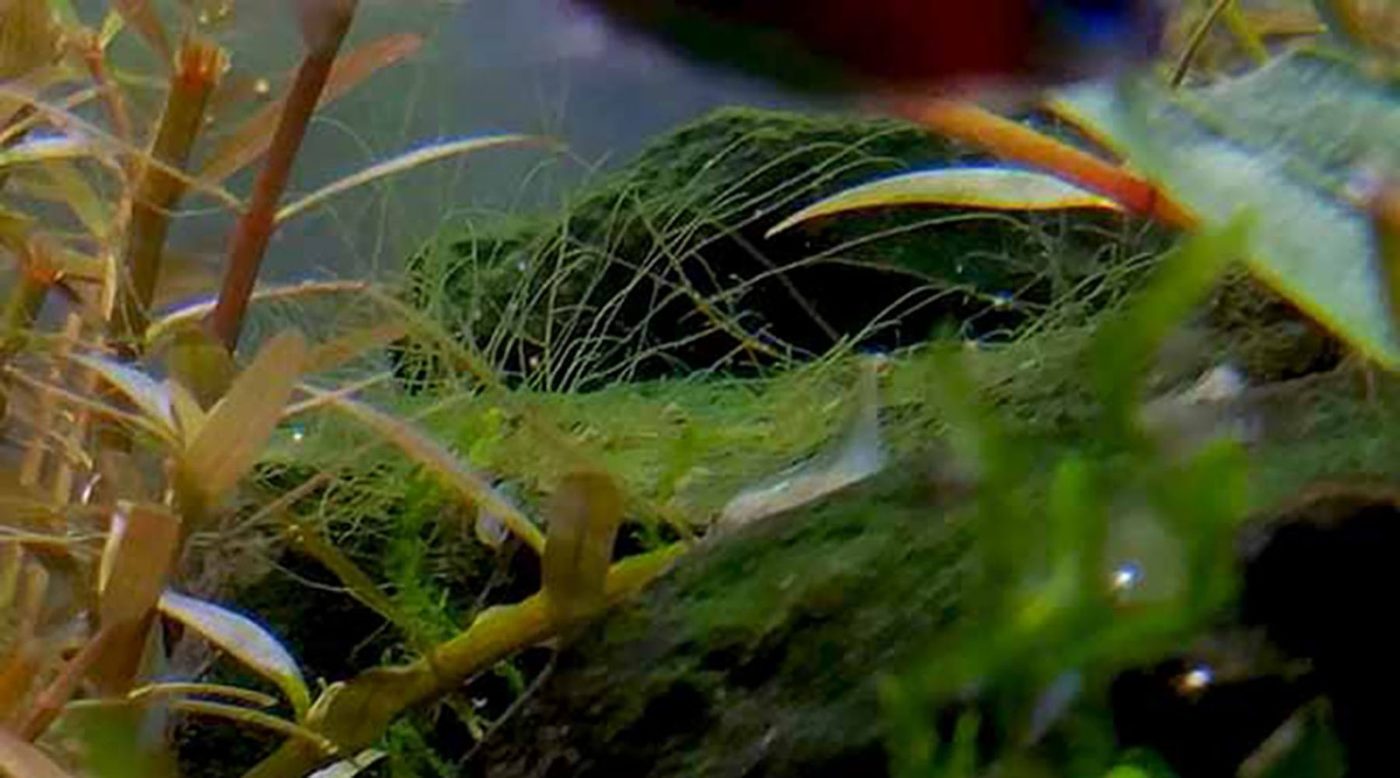
12. Hair Algae (Rhizoclonium)
Thin, cotton wool-like, greenish-greyish threads stretch for a couple of centimeters. These algae will not stick to surfaces. It frequently appears with low nutrient levels. It is also connected to low CO2 levels and low flow.
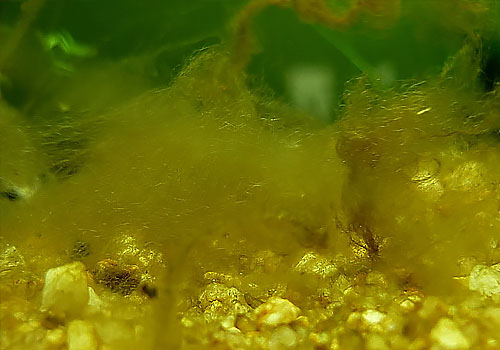
Algae eaters love it. It is also an excellent complementary food for all herbivore fish. It is advisable to clean the gravel once it appears. The strong flow will limit its growth.
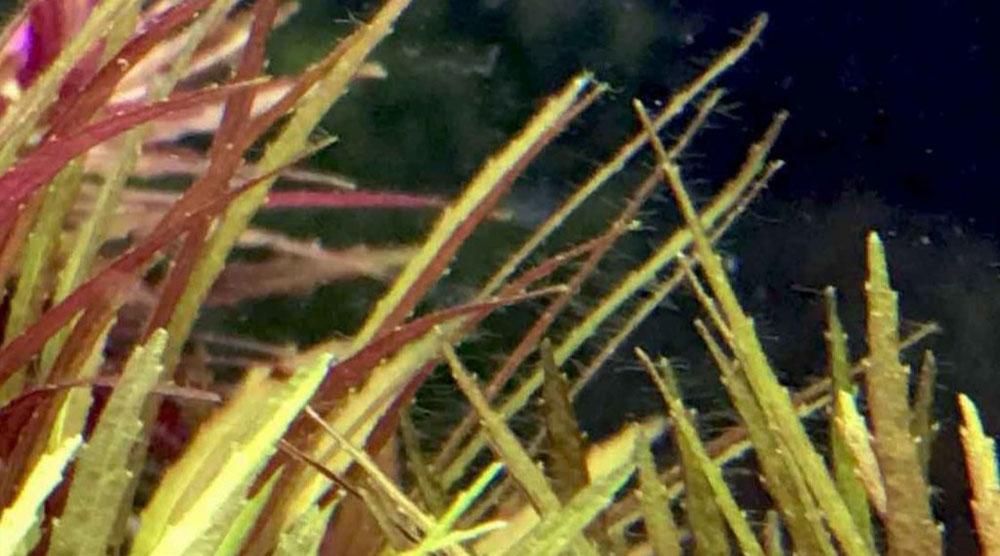
13. Staghorn Algae (Compsopogon sp.)
Threads of grey or bluish horn-like branches. It typically appears on leaf edges in the form of fluffs and likes areas closer to the surface. It sticks hard, and the surface is slick, making it almost impossible to remove.

High ammonia levels, low flow, and nutrient balance issues will favor the appearance of these algae. Clean the gravel and the filter if it is clogged and the flow is weaker. Cut the infected leaves. Stop the filter for a couple of minutes to apply liquid carbon additives such as Evoke; the algae will turn red and die.
Common Causes of Staghorn Algae
- Spike in ammonia/organic waste levels
- Stressed plants/old growth
- Change in tank maintenance regimen that causes temporary instabilities
Solutions for Removing Staghorn Algae
- Have a regular maintenance/water change schedule
- Have a regular fertilization schedule and stable CO2
- Pruning and replanting of healthy tops, discard old growth
- Spot-dose with Evoke directly on algae and Peroxide Treatments
Don’t panic – it may be temporary and go away quickly.
Other Issues that are Often Confused with or Associated with Algae
Surface Scum
Surface scum is not algae. It is bacteria. Plants in the water will release protein when under stress caused by CO2, nutrient, or even temperature issues. The utterly transparent protein is lighter than water, so it will accumulate on the surface, forming a thin layer – ideal media for different types of bacteria, just like a lab petri dish. In the end, you will see the bacteria, not the protein layer.
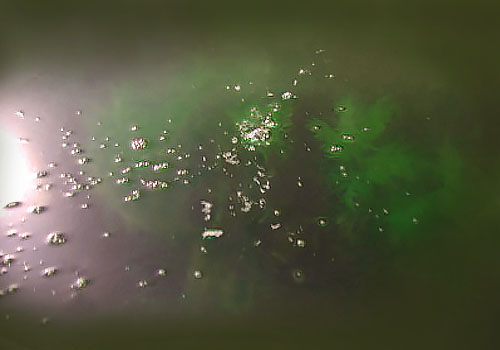
This protein layer will also give life support for certain algae. It will transform its color to green. The version without algae will look opaque. Besides being unattractive, Surface Scum has another adverse biological effect – it limits the gas exchange on the surface. This can result in CO2 and oxygen imbalance and lead to further algae issues, as filter bacteria also need a lot of oxygen to thrive.
It is essential to remove Surface Scum regularly or keep it clear. You can use a surface skimmer to remove it continuously or temporarily, elevate lily pipes to ripple the water surface, or change the type of outlet pipe used. Aeration will also remove it. See the Video of Surface Skimmers.
Pro Tip: As a quick removal method, place a kitchen paper towel on top of the water and quickly remove it, repeating this method with new towels. This will altogether remove Surface Scum. This is often done at shows before pictures are taken.
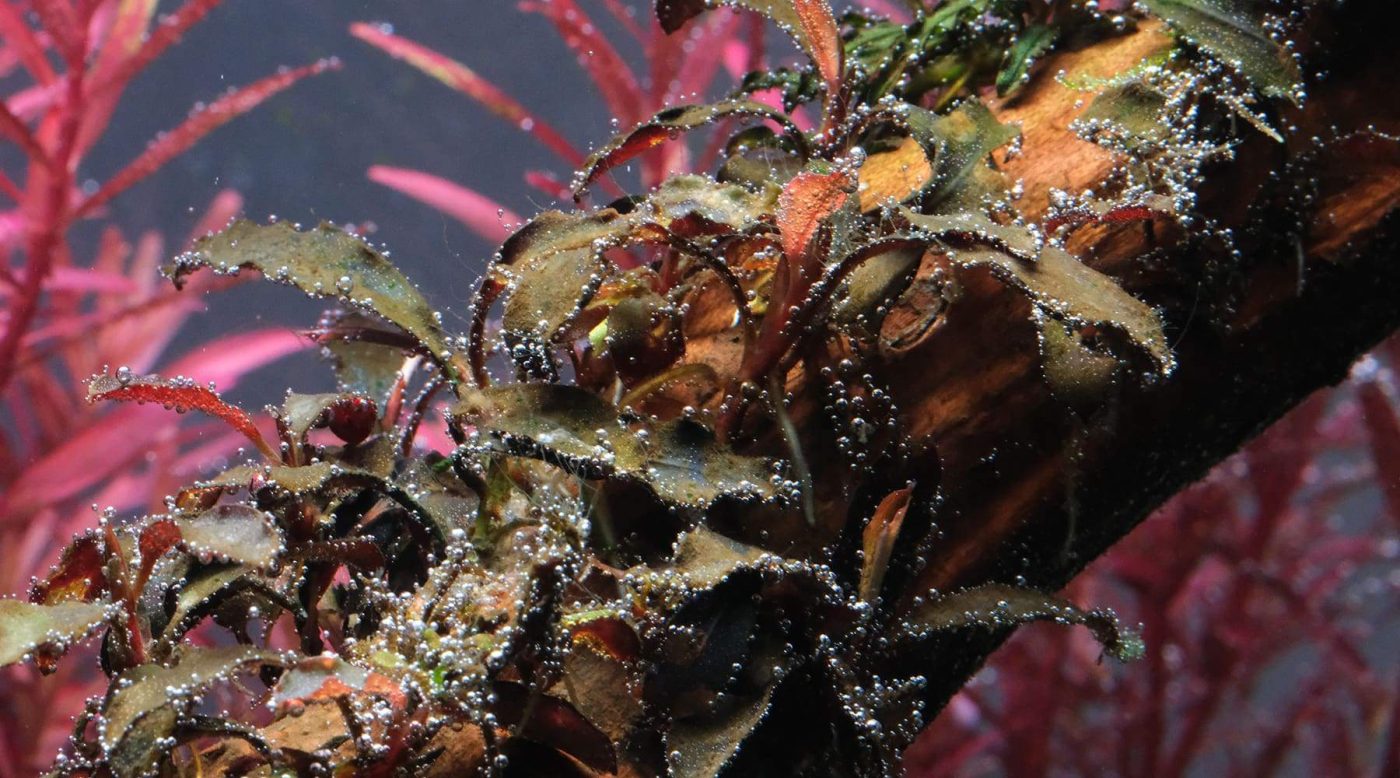
Fungi
It almost always appears on the spider, aka red moor wood, in the form of a white slimy surface – forming spots or continuous mold. It is entirely harmless, and it will disappear by itself after one or two weeks. The appearance of the fungus is caused by organic material and spores present in this type of wood. Its appearance is inevitable, and you must wait until it disappears as it will not release harmful substances into the water.

Some algae eaters will even eat it. If you do not like the look of it and do not want to wait for it to disappear, you can brush it off with a toothbrush or siphon it out.
In old tanks, the fungus can be found in two places: on decomposing fish and on rotting food. Physical removal by vacuuming it or taking it out with a pinsetter, aka tweezers, will solve the problem.
Brown Water or Yellow-Colored Water
Water can be colored for several reasons. Hardscape is the number one cause of brown water. Driftwood can release tannins that will give the water a darker tint. Dark Wood and Mangrove Roots are premier sources of color. Often, dark-colored, brown water is seen in nature. It even serves as a natural habitat for certain fish types that thrive better in waters like these. Remember the Amazonas waters? Companies like Azoo (Triple Black Water) offer products that explicitly have the purpose of producing these conditions.
If you are not happy with this coloring, you can improve it with regular and larger water changes, but you will need a lot of patience until most of the tannins from the wood have been released into the water. Using more significant amounts of Seachem Purigen in a filter will drastically improve the clarity of aquarium water. It will become crystal-clear within hours. The absorbing capacity of Purigen is limited, so recycling or changing it after some time may be needed. Using aquaLife activated carbon will also help.
Low quality aquarium glass can also cause the water to look a little brownish. Highly transparent, ultra-clear museum quality, glass aquariums are best, like those from Hydra Aquatics, UP Aqua, or Mr Aqua. Here is a video on choosing a rimless aquarium.
Bad Smell
Contrary to the smell of older, “conventional” fish tanks, the modern “Nature Aquarium” or aquascaped aquarium should not have any foul odor. The crystal clear water and harmony of living creatures within should create an ecosystem that releases the odor. If a “Nature Aquarium” Aquascaped tank smells, it is because there is a problem within the system, and gases are being released in the air through the water’s surface.
The traditional “aquarium smell” (marsh smell) mainly comes from ammonia gas, formed from organic decomposition. Ammonia, in higher concentrations, smells like urine. These smells will indicate general aquarium hygiene problems; the gravel is not clean (wrong type of substrate), the filter is not clean, the system is not designed well (more filtration may be needed), there are excess algae, plants are decomposing, not changing your water or cleaning the aquarium regularly.
If your aquarium smells, clean it thoroughly. Clean the filter, perform a larger water change, and create conditions under which the nitrifying bacteria can do their job, transforming ammonia into nitrate. If irreversible rotting occurs in the substrate, you might have to take your aquarium apart and start with a new ecosystem, replacing the substrate.
Cloudy Water – Bacterial Bloom
White (opaque) or cloudy, milky water is typically caused by an overgrown number of beneficial bacteria (not dangerous to humans). In new tanks, it can be caused by excessive use of water treatment products; in old tanks, it is a sign of bacterial imbalance. You might also experience it after cleaning the filter. This is when the balance is more fragile.
If bacteria cause cloudiness, adding more filtering bacteria will not help the issue. Also, more robust filtration or frequent water changes will most likely prove useless. Try using aquaLife Clarify. If the problem returns, you might want to add some Activated Carbon to the filter media. If that does not solve it, install a UV filter
In most cases, the cloudy water will disappear after a couple of days if you have good filtration and biological balance. Water changes will also help get the balance back, but they will not address the root cause.
Filter the aquarium with a UV sterilizer to clear cloudy water quickly. They will kill all bacteria circulating in the water. The UV can be connected to a separate water pump if you do not want to cut your canister filter hoses. Mr Aqua makes UV models that built in pumps and can be used inside the aquarium.
Foamy Water Surface
The foamy water surface is a surface scum (discussed above). The protein layer on the top of your water is filled with bacteria, forming a “cap” on your aquarium, preventing gasses from escaping. They will accumulate under this layer and form bubbles, producing foam. Refer to the Surface Scum description above for further details.
Aquarium Algae Types: Final Thoughts
You may have noticed a pattern in how to treat the various aquarium algae types. There isn’t one way to treat them all, however, common patterns include:
- overfeeding your fish,
- allowing too much or too little aquarium light (or natural light) into your tank,
- not performing enough water changes, and
- having an imbalance or too low of levels of CO2, nitrates, and phosphates.
Learn more about algae busters here.
New Tank Owner? Expect to See Some Algae!
Remember that several aquarium algae types will grow in newly planted aquariums. You can expect to see “hair” algae or brownish-green diatoms in a freshly planted tank. If you have brown or green diatoms, remove them from your glass and siphon or brush away from your rocks and decorations. Once your aquarium plants start growing, the diatoms should disappear.
Aquarium Algae Eaters
Purchasing a few cleanup crew invertebrates and fish such as Amano Shrimp, Rosy Barbs, Black Mollies, Otocinclus, and Bristlenose Plecos will also help, as they will happily feast on many aquarium algae types. Learn more about how to care for Amano shrimp, or see this article on the best algae eaters. It is always best to get your livestock from a local aquarium store.
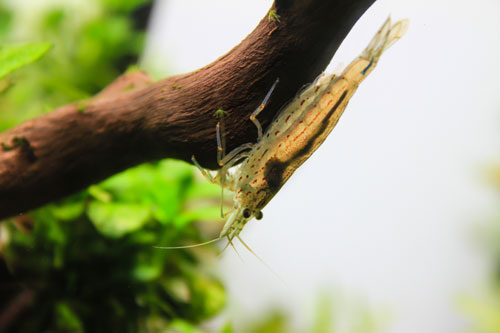
Amano Shrimp
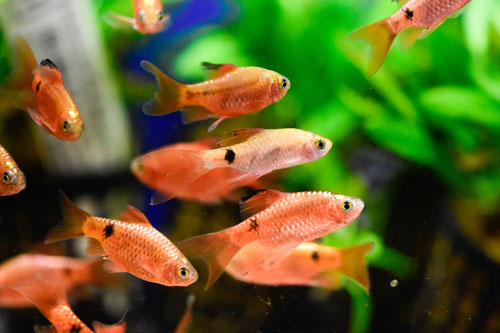
Rosy Barbs
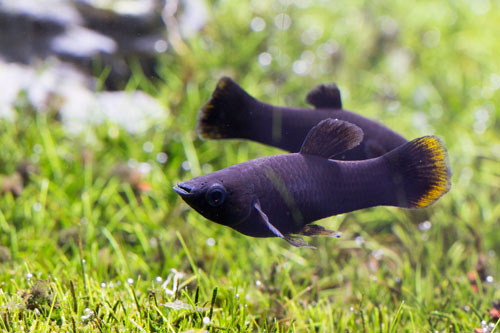
Black Mollies

Otocinclus
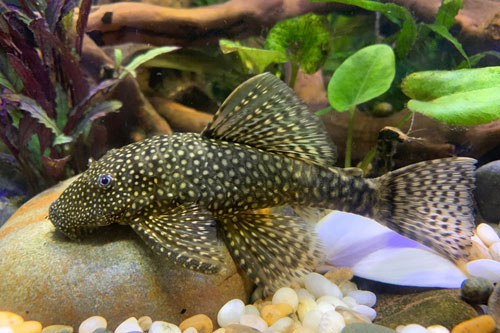
Bristlenose Plecos
How to do a Lighting Blackout to Remove Aquarium Algae
Basic Steps of Performing a Blackout:
- Feed the fish one hour before starting the blackout. They will not eat for the entire course of the process. Do not overfeed them. Feed them the regular amount of food.
- Try to physically remove as much algae as possible. Use algae scrapers, a toothbrush, or an aquaLife Algae Brush to remover algae on affected leaves.
- Perform a 50% water change
- Turn off the CO2 for the entire course of the blackout
- Stop fertilizing your plants during the blackout
- Introduce an air-pump or raise the inflow lily pipes to provide oxygen to the system during the blackout
- Cover the aquarium with a thick blanket without letting any light through – not even at the corners. Cover the top of the aquarium with something so the blanket will not fall into the water. However, evaporation from an uncovered aquarium may also make it wet. It would be best if you could get black wrapping foil.
Peroxide Treatment For Algae in Aquariums learn in more this algae removal method here
Sources:
2hraquarist, John Tullock, Green Aqua, Jeff Miotke, Ralph Cabage
Questions? Please contact the experience team at SevenPorts. Our team can help point you in the right direction to help you mitigate your algae growth. We will also recommend the right products to boost your plants’ health or help reduce or get rid of algae.
There are other aquarium algae types we didn’t cover in this blog post, but we hope that this guide has been a helpful start to ensuring excellent plant health and a clean-looking tank! Learn more about fighting algae one step at a time and how to control algae with the right algae busters here.